BOOK 04/25Front of house & tables
Counter Mode
Counter Mode is a separate package for shops that sell without tables (cafes, bars, food trucks, quick-service counters) — tap the menu, pay instantly, and hand the customer a queue number. Works on mobile, tablet, and desktop, but most shops run it on a tablet mounted landscape at the counter (this guide's screenshots use a tablet for that reason). The back office is the same as regular J-POS, minus the table-bound features.
Recommended: mount a tablet landscape at the counter
Why landscape
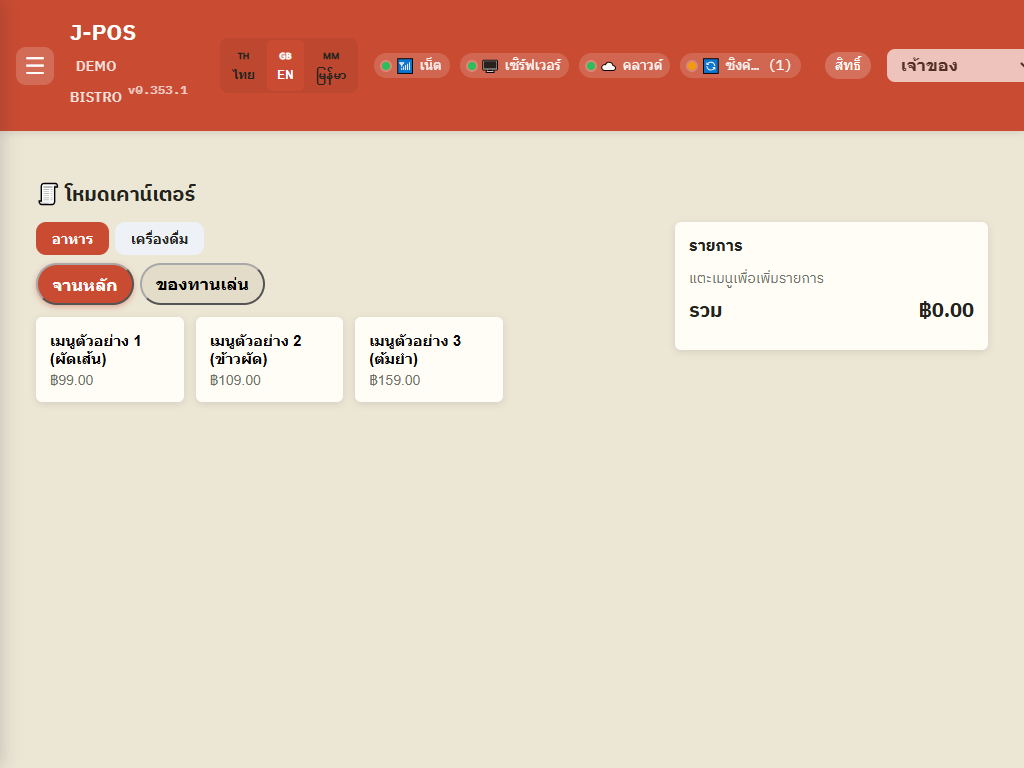
Most shops keep a tablet permanently mounted landscape at the counter — this screen is designed for that. The cart always stays docked beside the menu (no scrolling to find it like on a portrait phone), and the menu grid widens into more columns to fit the available space, showing more items at a glance. It's built for all-day continuous use.
It also works on a portrait phone (e.g. a server walking around taking orders), just with less room — the cart moves below the menu instead.
Open full size
Start a sale in Counter Mode
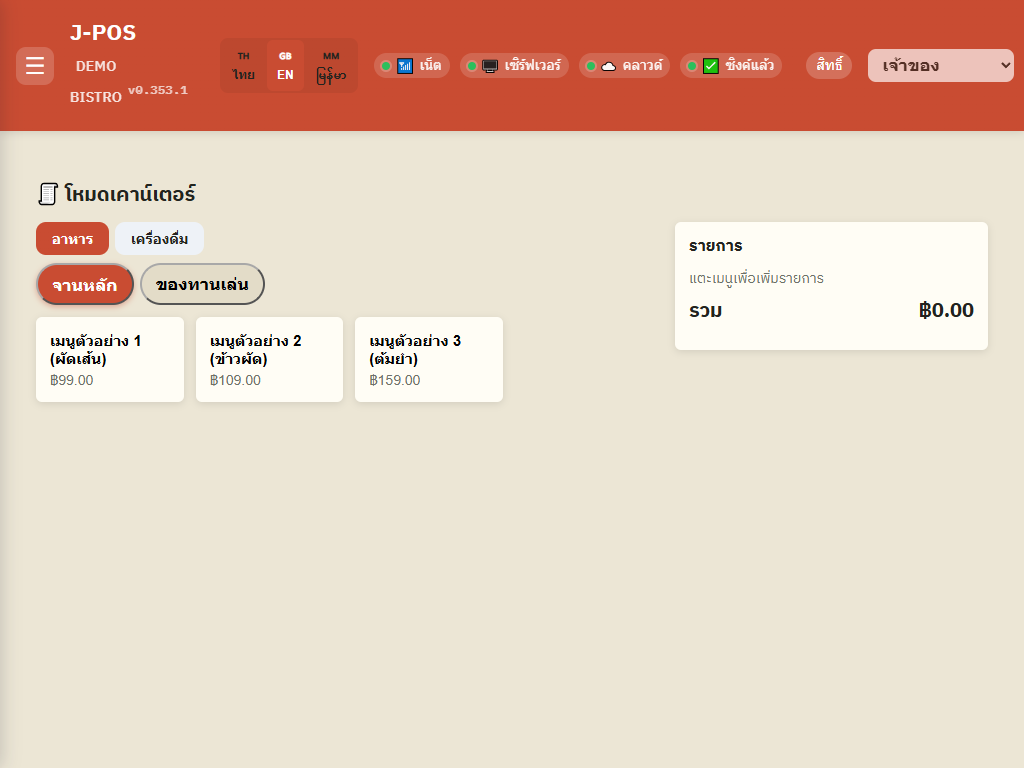
Pick a group and a category
The top row picks a menu "group" (e.g. Food/Drinks), the row below picks a "category" within it (e.g. Mains/Snacks).
This screen remembers this device's own lane automatically — reopening it on the same device always returns to the same lane, so multiple devices can sell at once in the same shop without colliding.
Open full size Tap a menu item to add it
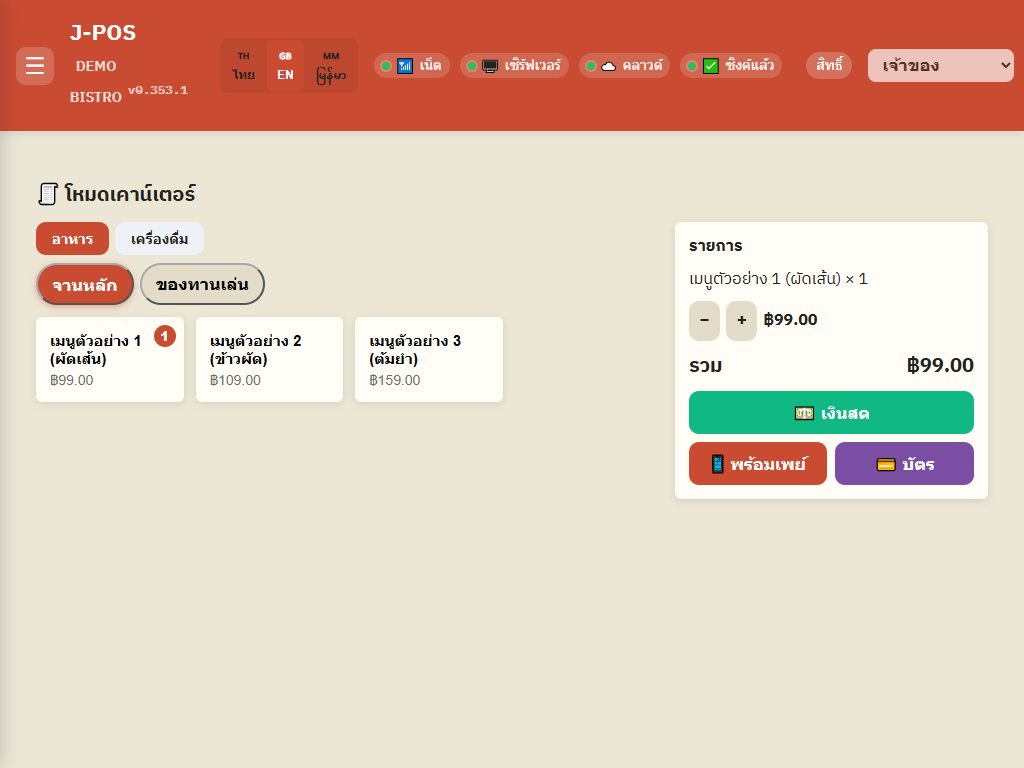
Tap a menu button to add it to the cart — the running total beside it updates instantly on every tap.
Adjust each line's quantity with the −/+ buttons right in the cart, no need to go back to the menu.
Open full size
Take payment immediately
Choose a payment method
Tap cash, PromptPay, or card — the same payment options already configured for the shop in the main system, nothing to set up separately.
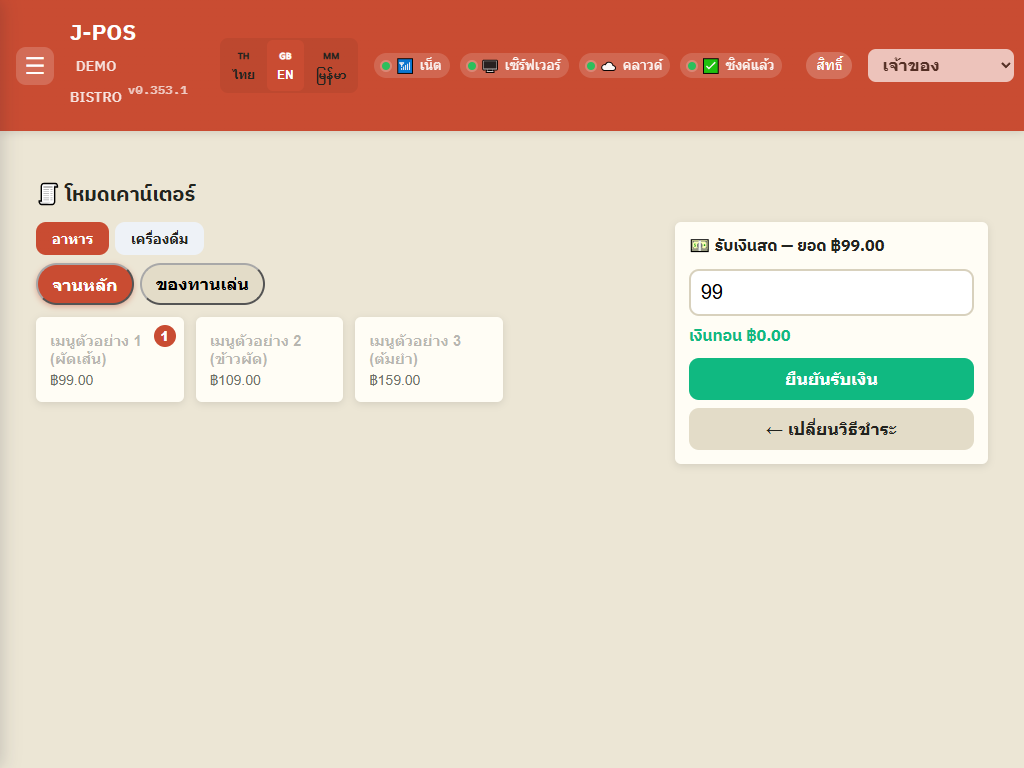
Open full size Cash: enter the amount received, check the change, confirm
The exact bill total is pre-filled; edit it to whatever the customer actually handed over and the change is calculated instantly.
PromptPay: the system shows a QR code for the customer to scan, then auto-closes the bill once the bank confirms the payment came in — not the instant the button is tapped.
Open full size Get a queue number, print the receipt, sell the next order
Once paid, the system issues a queue number right away for the customer to wait on, with a reprint-receipt button if needed.
Tap "Start a new sale" to clear the cart and be ready for the next customer immediately.
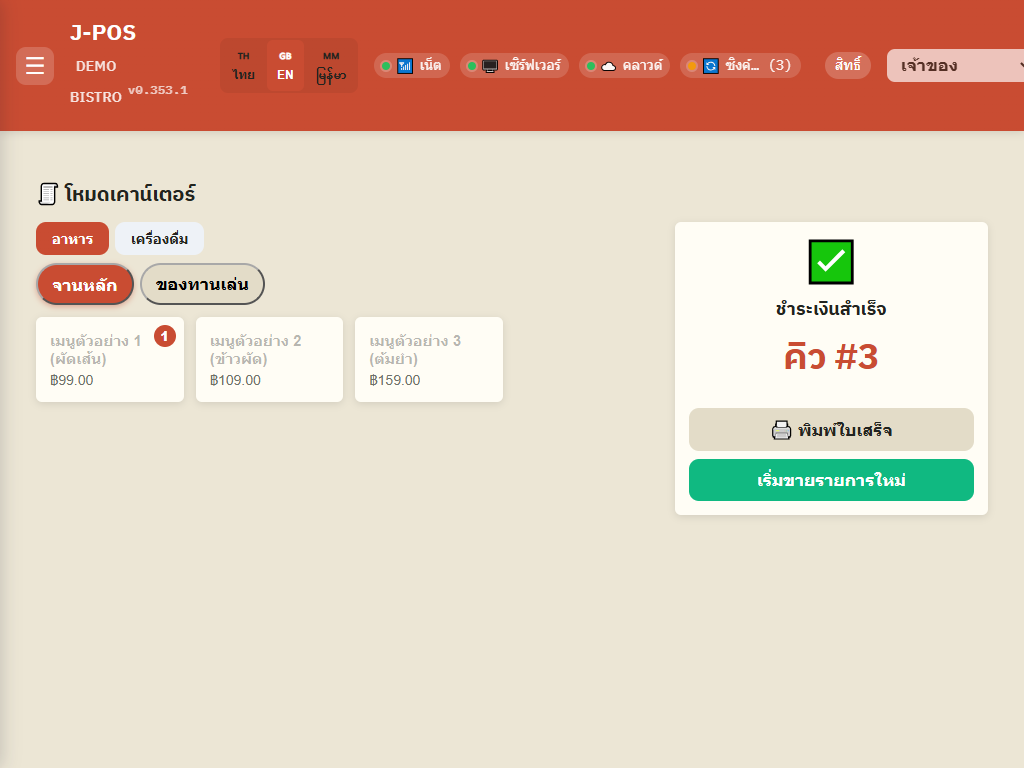
Open full size
Counter Mode's back office
Everything works the same, except table-bound features
Menu, stock, staff, permissions, shifts, reports, promotions, members, printers, and so on all work exactly like the table-based system.
Floor plan, table reservations, and bottle-keep are hidden from the admin menu, since they don't apply to a shop that sells without tables.
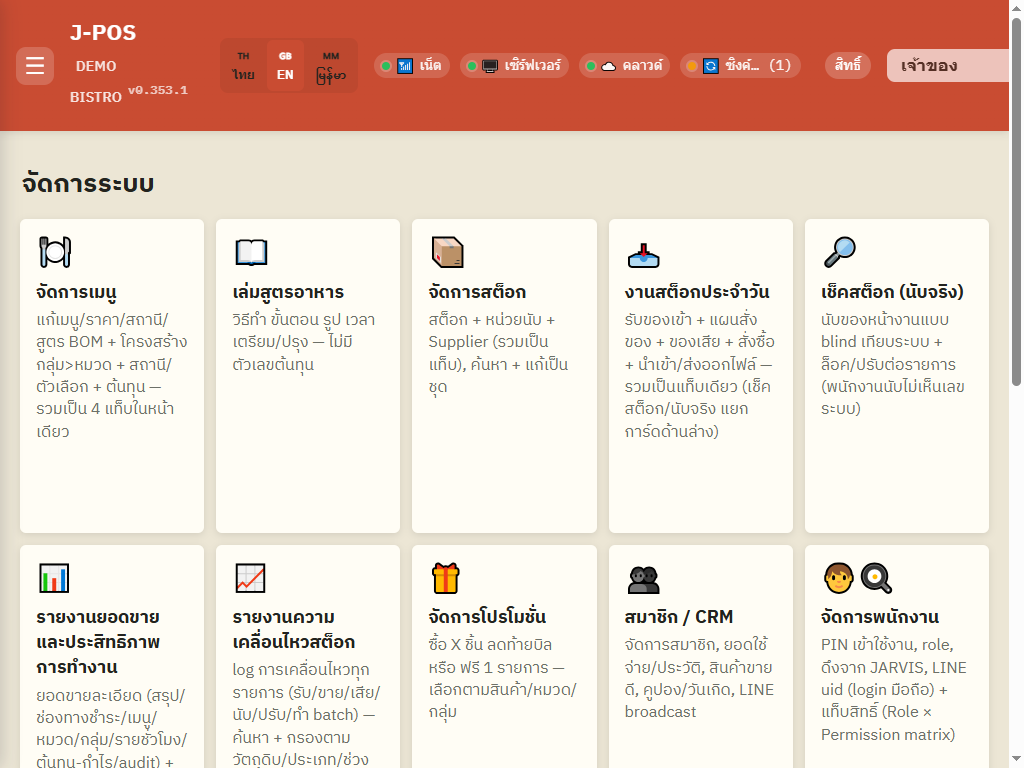
Open full size Check the shop's current mode on the settings page
The "Shop settings" page's General tab shows a "Sale mode" badge telling you whether this shop is on Counter Mode or Table Mode (view only, no switch here — see "Switching modes" below).
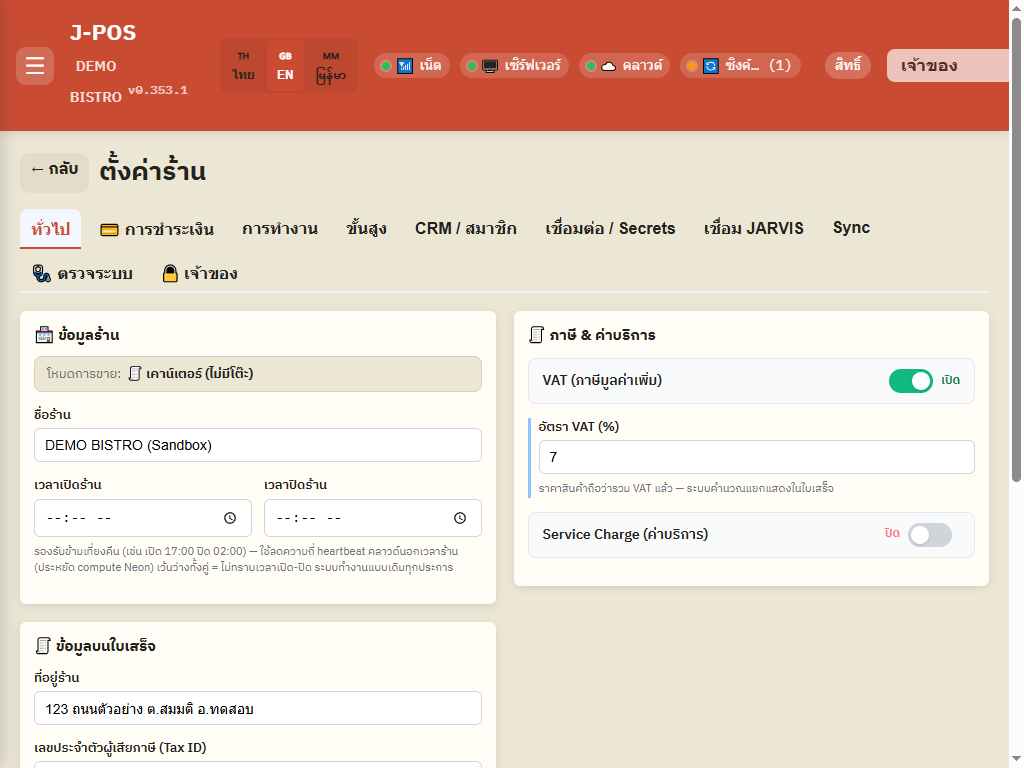
Open full size
Common points of confusion
This lane still has an unpaid bill from before — can't start a new sale
If this device/lane still has a bill that hasn't been closed (e.g. a PromptPay payment not yet confirmed), the system won't let you start a new sale until the existing bill is resolved — a link takes you straight to that bill's full receipt page.
PromptPay with no confirmation slip needs a manual close on the full bill page
If the customer paid via PromptPay but the system hasn't seen the bank's payment notification yet (slip didn't arrive / bank network is slow), Counter Mode won't auto-close the bill. A staff member with the right permission needs to confirm the payment manually on the full receipt page (`/bill/[tableId]`), which already has a no-slip confirmation step.
You can't switch between Table Mode and Counter Mode yourself
Counter Mode is a separate SaaS package from Table Mode — a shop on this package can only use Counter Mode, with no in-app switch back to Table Mode. To change packages, contact the J-POS team to have it reconfigured.
The queue number resets at shift close, not at midnight
The queue number restarts from 1 every time a staff member successfully closes a shift (not automatically at midnight) — if the shop stays open past midnight without closing the shift, the queue number just keeps counting up until the shift is actually closed.